A few weeks ago I shared a brief glimpse into a travel mini album that I made so today I wanted to share the whole thing with you. Last month my Mom and I took a trip to Portland for a few days. Its a relatively short flight for me being in California and my Mom lives in Oregon so it was the perfect place for us to meet up for a little getaway.
Note: This post contains affiliate links, which means I receive a small commission if you make a purchase using the links below. There is no additional cost to you if you use these links.
This album came together super quickly which is always a bonus for a mini album. The longer they take the less I want to make them so tackling these kinds of small and quick projects is totally my jam these days.
Links to all the places I visited will be at the end of this post.
While my Mom and I were out shopping we stopped into one of my favorite Portland stores, Oblation Papers & Press. This store has a working letterpress inside and its always fun to watch them work. While I was there I picked up a super cool folded envelope from the company
Envelopments that I thought would be a great page for my upcoming December Daily® album. However, the more I looked at it the more I also thought it would be a great cover for a mini album. I will share a detailed diagram of how I made the cover below but I wanted to make sure I shared where my cover inspiration came from. These envelopes are beautifully made and the shimmery gold envelope I bought is so pretty.
Here's a look at the folded up complete album. I love how contained it is and I can totally see myself replicating this system again for sure.
Inside the front cover and inside the pocket are typed up journaling notes for each day of our trip. This is something I've done for several mini albums in the past and I like to have my notes in one central area of the album so I can look back on them years from now and read all of the detail. I don't typically like to do heavy journaling inside mini albums and this is a way for me to do that without having to do all the journaling on each page.
Here you can also see what the base of the album is. Its super simple. I used 10 sheets of plain white cardstock that I cut down to roughly 10x7 inches. I used my
We R Memory Keepers score board to score down the middle of each of the sheets and then used my
long arm stapler to staple the pages in the middle. I did trim up the edges so they were all even using a rotary cutter. This part of the process is hard with the cardstock and its typically easier to do when its just paper.
For the cover of the actual album I used stamps from Kelly Purkey Shop, the hexagon stamp is from the
Home Sweet Home kit stamp set and the alpha is the
Lexington Alpha Stamp. The ink colors I used are
Hero Arts Shadow Ink in Lime Green and
Studio Calico Color Theory ink in Clear Blue.
In the
Kelly Purkey shop latest release she had a stamp set in her A
dmit One Travelers Notebook kit that you can use to make custom tickets. There was also a
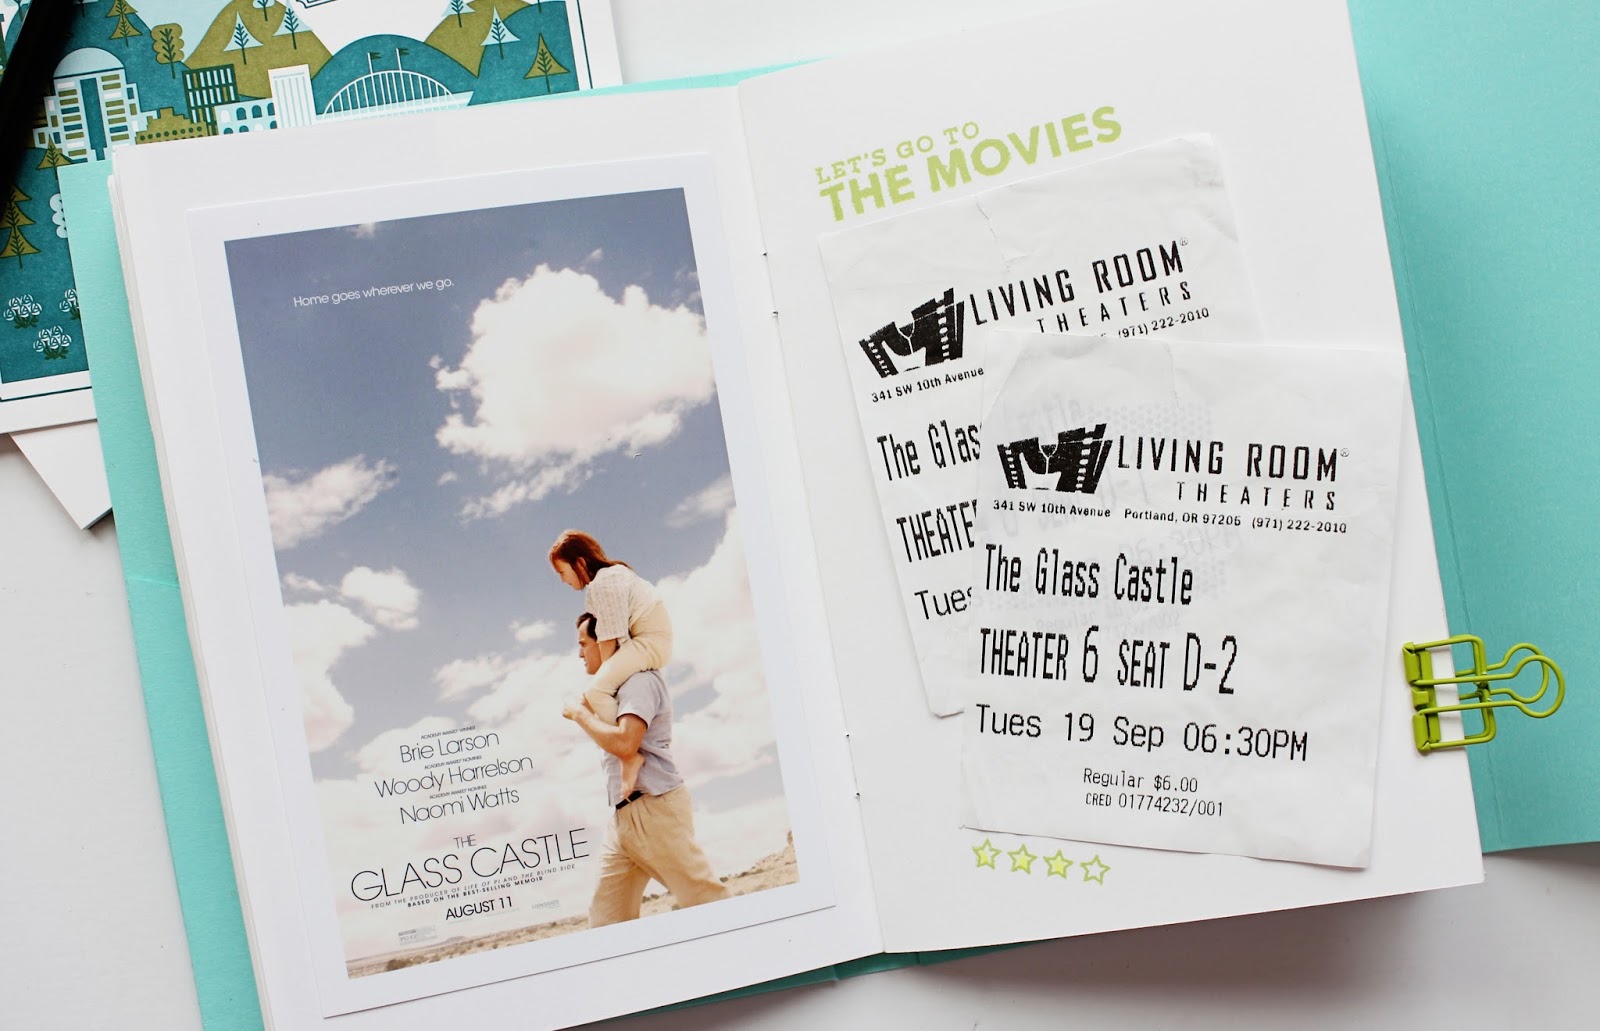
companion alpha stamp to give you even more customization options. For the album I made a ticket for each travel day and clipped them to one of the photos. I love how these tickets turned out and I loved how they looked clipped to the photo. I replicated that a few more times in the album because I love interactive elements in my mini albums, even if its just a lift and reveal type item. I find that the more you have to interact with the album the more you will actually slow down and look at all of it.

The carpet at the PDX airport is pretty famous. Sadly the original carpet was all torn out and replaced a few years ago but its always a fun photo op when you pass thru that airport. The element on my photo on the left was added thru the Instagram Stories geo tag feature and I loved it so I made sure to add it to my photo and save it while I was there. On the right I clipped an image of the carpet to an image of the state of Oregon to creating a clipping mask. I printed it out and fussy cut around it and used some pop dots to elevate it off the page. I added in a simple title using
Kelly Purkey's 4x6 White Mini Alpha Stickers. I love these stickers!! A must have item in my stash for sure.
I typically like to be fairly consistent with my mini albums so if I do something for one day, I will do the same thing again for the next day. I decided to type up on a simple sheet of note pad paper all of the things we did that day so I didn't have to do a lot of individual journaling and I love how they turned out. I added in more stamping using the
Lexington Alpha stamp set and added in some washi tape in coordinating colors. I didn't worry too much about my typing being perfect. That's not typically how I roll but for this I just let it happen, mistakes and all. On the right side I dressed up my photo with a stamp from
Kelly's Home Sweet Home kit. I loved how the sentiments on that stamp set could be used for travel photos too.
The best thing about the Ace Hotel in Portland is the way the rooms are decorated. They are so unique and cool and provided lots of photo opportunities. I layered a bit of paper from the notepad they leave in the room and added more stamping from the
Home Sweet Home kit directly on my photo. I wanted to share several photos from the hotel but I didn't want to dedicate a lot of pages to the mini album so I stacked several and stuck them down with washi tape so you could flip thru the photos.
Here's a super cute pic of my super cute Mom at lunch at Deschutes. The coaster is just stuck down to the page and the stamp I used is an older stamp from Kelly Purkey, its all about beer so that one gets used a lot. The Mom stamp is also Kelly's but it has also been discontinued. And yes I wrote the wrong date, ugh.
Powell's Books is always worthy of a stop and the shelves and shelves of books are so fun to look thru. The bookmark I added to my page is old it was from a trip I took a few years ago but I used it because it was orange and it matched that rubber piece from an old
Studio Calico kit.
We went to the movies at a super cool theatre by the hotel and I didn't really take any pictures but I saved the tickets and printed a photo from online of the movie poster. The stamps are older Kelly Purkey stamps.
The start of Wednesday's adventures with a repeat of the page above. That mural by the artist
Faith47 is always a must to walk by and snap a picture of. Stunning.
I saved all of the bags I got if I made a purchase and cut down all that I could to use as bases for either photos to be clipped or in this case a business card. Alder & Co. is such a beautiful store. The flowers are always amazing. I added in a simple chipboard element and puffy sticker to my photo. Nice and simple.
Another interactive photo flip for a stop at Schoolhouse Electric. Serious home inspo at this place, my Mom loved it.
We couldn't visit The Collage store location that I wanted to because it was being renovated but we met the owner and she directed us to another location. It was a super fun store to walk thru. A simple little flip element added because I wanted to save the screen shot from my facetime session with the family. I was soaking wet which you cant really see in the photo but I will always remember getting caught in the rain when I see that photo years from now.
Added in a simple image of something I bought while I was at Collage and a postcard of a rainy Portland.
You have to eat at Cheese and Crack if you go to Portland. Especially if your an
hors d'oeuvre lover, its finger food at its finest. Adding some simple stamping to the photo and a little puffy heart to keep it simple.
I saved a few of the lobby photos to add to other pages and here is one I took from the loft landing looking down on the common space.
Blue Star Donuts is better than Voodoo if you are looking for something a bit more gourmet. I still love Voodoo for the offbeat and fun take on traditional donuts but my Mom wanted to try something new so Blue Star won this trip. More photo stamping with word strips and a puffy star for embellishment.
Clipped business cards is my new jam.
There's a really cool app called
This. and I love how you can label photos with it. I mimiced that look on my own in Photoshop so I could label the donut flavors on my pic. The Lemon Poppyseed is the BEST if you are curious. The Stumptown Coffee is pretty damn good too.
Oblation Paper is the place I mentioned above where I bought the inspo envelope. Please visit this place if you ever end up in Portland. They have really lovely cards and paper goods.
They also have a collection of really cool typewriters and you get to watch them Letterpress while you shop.
Porch Light is a place I had never been and it ended up being one of my favorite stops. They gave out super cute printed cards that you can see peeking out that listed all the near by local stores, restaurants and coffee shops, etc. I love how they wanted to share the love to other places, good on them. On a side note I've never bought a bottle of perfume on vacation before but from now on this scent will always remind me of Portland.
On the last day I hardly took any photos but I did get a photo of me and Mom to add in to the book.
For the very last page I added in an image I took when I got home of some of the treasures I brought home. Flat lay images are super fun and I think I'll do this on every trip going forward. Its a fun way to include those mementos.
That's it for the album contents. I really love how this one turned out, and I know I always say that but I really do love it.
Since I had already put together my album I recreated it for you so I could share how it came together. Its a lot easier than it may seem. The first thing you need to decide is what size you want the inside album to be. I wanted the pages of my album to be 5x7 so I knew that the outside cover need to be larger than that to fold over the finished album.
Supplies
3 - 12x12 sheets of cardstock
Clear Velcro dots
Adhesive
Ruler
Because my album cover was going to be wider than 12" when open I needed to create the cover in two parts. I did the measurements based off of my 5x7 album and here is what I used. The front left flap of the album is 10 1/2" wide by 7 5/16" tall. I scored two lines from 5" in to the left edge leaving a 1/2" gap between. The original cover I made that you see in the images above only had 1/4" scored lines and it ended up being too tight when the album was done so I replaced it with this one that I'm showing here. You need to account for the thickness of the completed book which I didn't realize would be as thick as it was when I was done.
For the front right side of the cover you need to cut a piece of cardstock 9" wide by 7 5/16" tall and score two more lines from 5" in that are spaced 1/2" apart. I also cut an angle into the front flap like the envelope sample I was using. You can also leave it straight, its up to you.
For the pocket you need to cut a piece that is roughly the same size as the inside front but add in about 1/2" around the edge that you can cut and score so you have something to adhere down.
When its time to assemble you place Cover Part B on top of Cover Part A lining up the left edge of Cover Part B with the right hand scored line of Cover Part A. Fold the edges of your pocket down, add adhesive to the under side and line up the edges.
One the album is complete add in the velco dots and close up the album. I added in a piece of flare on top of the outer cover just to create a closure. I removed the pin portion of the flare and used three layers of foam tape to stick it down. Its holding up beautifully so I don't think it will pop off.
I've been asked to also share some of my favorite Portland Places so I wanted to list them here for you too.
Places to Stay
The Ace Hotel Portland
Places to Eat
Cheryl's on 12th, great for a quick breakfast
Jake's Seafood, Super old school with great Bar service
Piazza Italia, make a reservation
Blue Star Donuts
Stumptown Coffee, sip a cup in Ace Lobby and people watch, so fun.
Clyde Common, in the Ace Hotel for drinks
Cheese and Crack
Salt & Straw
Deschutes Brewery
Places to Shop
Oblation Paper and Press
Porch Light
Powell's Books
Alder & Co.
Made Here PDX
Schoolhouse Electric Company
Collage
Lark Press
Ecru Modern Stationer
If you made it this far, you get a GOLD MEDAL! Thanks for being here. I appreciate you.